Previously in
Peril at the Greenhow:
Peril at the Greenhow, Part Three

The city guardsmen and magister had just left when Harlow opened
Umberto’s door. Umberto had been sitting at the desk while he gave his
statement of events to the guardsmen, eyes still where they were now -
on the broken and shattered window frame. The memory played in his head
over and over again. The wind catching the hood and revealing the face
of his dead sister. Well, possibly dead sister. What stayed in his mind
most of all were her eyes. The eyes that had looked to him for
protection as a child. But as she stood on that rooftop all she had in
them then was hate.
“We’re ready,” Harlow said when Umberto hadn’t addressed him. “We
have the Greenhow Tavern surrounded. When the proprietor, Aeon, returns,
we’ll move in and arrest her.”
“How are you so confident?” Umberto said, still not looking away from
the hole in the wall. “That it is this Aeon person? Especially after I
have given a statement saying my assumed-to-be-dead sister made an
attempt on my life earlier today?”
“Aeon is an artificer,” Harlow said, a note of annoyance in his tone.
“She could be using any number of illusionary devices to make you see
that.”
Umberto finally looked to the aumarr. “But why my sister? How would
she even know to use that image? This doesn’t add up. You are telling me
to bake a cake, but giving me the ingredients of a pie.”
Harlow put on a smile that Umberto could see was starting to crack.
“All will be revealed in good time. Trust me.” Umberto opened his mouth
to say something, but Harlow put up a hand to stop him. “Once we have
her in custody, I'll make everything clear. You have my word, Umberto.
None of this would have been possible without your detective skills to
put me on the right path!”
Before Umberto could say anything, Harlow turned on his heel and left
the room. “Come,” he said from the hall. “I’ll escort you to the
tavern!”
Umberto let out a sigh. Something was off. That roaring fire inside
him was dwindling now, nearly smothered by the shadow of his sister.
After seeing the crime scene things were feeling like they had before
six months ago. The world was making sense again as he viewed it from
behind the lens of a detective. But Sliver had turned the world back to
chaos. Nothing felt right and nothing made sense.
“Are you coming?” Harlow called from down the hall.
“Yes,” Umberto said, getting to his feet. “I was just stuck in the
mud for a moment.”

Aeon made her way through the crowded market, being sure to look down
next to her every so often to make sure Beaky hadn’t gotten lost or
swept away in the sea of people. Deuce sat on her shoulder, playing look
out as always, but she seemed to feel the weight of him more than usual.
No, it wasn’t that. It was the weight of the deal she had just made.
This is really going to set you back, she told herself. It had
been a nearly constant thought since leaving Xanathar’s lair.
But not as far back as being dead, she reminded herself.
Yes, this wasn’t the best deal she had ever made. But it wasn’t the
end of her time as a spymaster - that was the important part. It was
going to be difficult, but Aeon had every confidence in herself that she
could come back from this. Hells, if she hadn’t had that confidence in
the first place she wouldn’t even be in a position to deal with
Xanathar. Or have been in a position to have a murderer after
you.
There was a tug on Aeon’s coat as Beaky pulled in closer to her. “Are
we nearly there?” A group of halflings passed by and the kenku eyed
them. “There’s too many sounds and way too much light.”
Aeon suppressed an eye roll. “It’s not much further now. We’re just-“
She stopped when Deuce tapped her shoulder. The small gold monkey
motioned for her to look up, and she followed his gaze, coming to a
stop. A small bird flew through the air, its wings flapping in an
unnatural way. The sun caught the side of its metallic body, and it
glinted for an instant.
This was one of Aeon’s inventions. Not quite a steel defender, but it
would follow orders. She used them to get messages out quickly to her
agents around the city. It flew with magic, leaving its wings to flap in
ways that could be interpreted by the agents.
She counted the flaps in her mind. Once. Thrice. Twice
quickly.
“Nine Hells.”
Beaky chirped nervously. “What’s wrong?”
“The Greenhow isn’t safe.” Questions, plans, and actions all ran
through her mind. There could be any number of reasons why the Greenhow
was compromised, but there were two very likely reasons at that moment.
Still, she needed more information. But she also needed…
She looked back down at Beaky. “Change of plans. I’m going to the
safe house near Trollskull - do you know the one?” He nodded. “Good. I
need you to take a message back to Xanathar and then meet me there.”
Beaky gulped and looked like he might cry.
Harlow looked annoyed. Umberto had been waiting with him on a rooftop
overlooking the entrance to the Greenhow tavern for nearly four hours.
The sun had well set by then, and Umberto was starting to worry more
about the rumbling in his stomach than if this Aeon person would
actually show up. It didn’t help that there were some delicious smells
from the tavern below. He did his best not to focus on it or try to
figure out what ingredients he was smelling.
“Tluning hells, where is she?” Harlow said through gritted teeth.
“She must know we’re here.”
That wouldn’t have surprised Umberto. In fact, he had suspected that
from the moment Harlow had brought him up to the rooftop. He had pointed
out three other buildings that guardsmen were set up on to keep a
lookout for her. Not to mention the other out-of-uniform guards spread
out through the street, connecting alleyways, and even in the tavern
itself. Umberto couldn’t help but consider this sloppy work. It felt
rushed.
If this Aeon person were half as skilled as Harlow had made her out
to be, she wouldn’t need him to point out the guards.
“Err, perhaps you and I should go into the tavern. Get a change of
scenery and keep an eye on things in there.” Plus, Umberto could finally
get a bite to eat.
Harlow looked as if he might protest, but then his shoulders sunk,
and he nodded. “Maybe that’s a good idea. You all have things under
control up here?”
The guardsmen all nodded.
“Good,” he said, then turned and headed for the stairwell door,
passing Umberto.
“We should probably disguise ourselves,” Umberto said. “Err, they
know what you look like after all.”
Harlow’s hand went for his coat pocket, then stopped. “You’re right.
I could wear a hood or something?”
Umberto chuckled, making a note in his head. “I have a disguise kit
in my pack downstairs. Come, I will turn you from tulip into a
rose.”
All eyes were on Aeon before she even got to the Greenhow. Just as
she wanted.
The Waterdhavian guards thought all they needed to do was take off
their uniforms to blend in, but Aeon could still see it. She could see
it in the way they sat, the way they walked, the way they breathed.
Deception and guile were her skills. They were just pretending like
they had them.
She let out a breath as she touched the first step up to the Greenhow
alone. She had a plan. Things were in place. But, like so many things
had been in her life, it wasn’t a guarantee. She took the next few steps
quickly and flung open the doors to her tavern.
“Greetings, ladies, gentlemen, and variations thereof!” She threw her
hands up in the air as she walked towards the front of the room and the
middle of the bar. Everyone turned in the same instant to look at her.
She saw eyes she recognized, others she didn’t, and a few that were
there to arrest her. One set in particular fell into the former and the
latter.
Hello, Harlow. That disguise won’t work on me. I hope you enjoy
the show.
“Step right up! Not only are all rounds on the house tonight, but I’m
selling all the juiciest, most life-ruining secrets of Waterdeep for the
low, low price of free!” A few people raised their brows. A few others
even stood. One old man who had already a few too many walked straight
up to the bar and ordered another drink.
“Who wants to know which Masked Lords are having affairs? Or which
stores are secretly being robbed by a gang of underground goblins? Or
better yet, which one of the undercover guards in here is the easiest to
pay off?” She said the last one directly to the disguised Harlow.
To her surprise, this antagonizing worked even faster than she had
expected.
“That’s enough,” Harlow yelled as he stood up from the back table. He
ripped off the wig and false nose, tossing them to the floor. The other
man at Harlow’s table, also disguised, looked at Harlow with a furrowed
brow. “I am placing you under arrest to later stand trial for-“
“Why wait,” Aeon said, cutting him off. “Deuce! Bring him in!”
The front doors burst open again, and in walked the magister from
earlier that day, Deuce on his shoulders. The little gold monkey
battered the bearded man and pulled on his cloak almost as if he were
piloting the magister.
Aeon stepped forward and pulled out an empty chair from a table. “I
couldn’t help but notice that there weren’t any magisters among your
undercover guards outside.” Guards in uniform and weapons drawn filed
into the tavern behind the magister. Aeon responded to this by taking a
seat. “So I decided to bring one myself. It is customary here in
Waterdeep for magisters to pass sentencing in the moment, isn’t that
right, Aumarr?”
Harlow stared daggers at Aeon but held up a hand to stop the
guards.
Aeon got comfy and put her feet up on the table, crossing them at the
ankles. “By all means, proceed with your accusation so the magister can
pass judgment.”
Harlow looked down at the other man at his table, who looked back at
him expectantly. For a moment, the aumarr didn’t seem to know what to
say. He was sweating. And it wasn’t because of the wig.
What was your end goal here, Harlow?
The aumarr straightened up and stepped forward towards the middle of
the room. “This woman,” he said, pointing an accusing finger at Aeon.
“Is a liar, thief, and manipulator.”
Aeon chuckled. “Tell the room something they don’t already know.”
There were a few laughs from the tables.
“Silence,” Harlow said with a raised voice. “You want me to tell them
something they don’t know - how about this? You got yourself in deep
with the Xanathar Guild. You… you promised them information but came up
short. This infuriated the Xanathar Guild.” He paused. “…and they
started making threats! If you didn’t get them what they wanted,
something bad was going to happen. But you couldn’t deliver - you were
in over your head playing the role of a spymaster in bigger
leagues.”
He turned to face the guards and the magister, a confident grin
spreading across his face. “What was she to do? The Xanathar Guild is
too big for her to contend with. It wasn’t a problem she could just make
go away. Unless she set things into motion to weaken them. Even destroy
them.” Harlow began to pace in the small area between tables. “The
Xanathar Guild has one big rival. The Zhentarim.” Several people shifted
at their tables. “If she could make it so the two factions went to war -
her problem might be forgotten about. And if the Zhentarim won, her
problem would be completely taken care of. And even if they didn’t, the
Xanathar Guild would be weakened to the point that she and her agents
could swoop in.
“So she planted sending stones in her music box trinkets and made
sure they ended up in the hands of Xanathar agents so she could track
them. She used them to follow her victims to the opportune place and
strike.” Harlow seemed to be enjoying his lie. “The first several would
just be to start suspicion. Then, she would start leaving calling cards
for the Zhentarim - so the Xanathar Guild would piece it together that
all of their murdered agents had been killed by their rival.
“And to really sell it. She used her skills as an artificer to
disguise herself with illusions to look like one of the Zhentarim’s most
infamous agents. Sliver Thornheart.” Harlow stopped in front of Aeon,
looking down at her with a smile like he had already won. “You really
thought you could pull all of the strings like a real mastermind. But
you’re nothing but a-“
“No,” came a voice from behind him.
Harlow looked as if a arrow had struck him in the back. “What?” He
said, turning around to face the speaker.
The man who had been sitting at Harlow’s table took off his own wig
and peeled off some fake sideburns. Impressively, the mustache stayed.
He stood and let out a sigh.
“I said no.” He looked at Harlow with a hard gaze. “None of that is
true.”
Umberto looked to the magister. “Please disregard what you just
heard. This woman is not part of the murders.” He paused, looking Aeon
over. “She may be guilty of other crimes, but not this one.”
“How dare you,” Harlow said, walking towards him. “You think you can
just come here and-“
Umberto put an opened hand in front of Harlow’s face when the aumarr
reached him. He looked past Harlow to Aeon. “Can we speak in private?
Perhaps in a back room?”
Aeon smiled. “I like you.” She gestured to the door behind the bar.
“We can use the storage room.” With that she got up, and made for the
bar and Umberto followed, moving past Harlow.
“I’ll not allow this,” Harlow said, sounding more and more like a
petulant child. “Guards! Arrest both of them!”
Before the guards could move further into the tavern, over half the
people at the tables stood, each drawing hidden weapons. Umberto froze,
as did the guards and Harlow.
Aeon smiled at Harlow. “You didn’t really think I came unprepared for
a fight, did you? Say hello to these agents of the Xanathar Guild. You
know, the guild that you claim has it out for me? They’re under orders
to protect me. At all costs.” She looked back at Umberto. “Come on.
Let’s talk.”
Umberto couldn’t help but be impressed. This woman was clearly on the
wrong side of the law, but he could still admire her complete handle on
the situation.
The storage room was more of a storage closet with a staircase in the
back leading down into a darkened basement. It was cramped, but Umberto
wasn’t planning on pacing or making a show like Harlow had. He was here
for information, and there was plenty of room for that.
“Err, thank you for agreeing to talk,” he said as she leaned against
the opposing wall, arms crossed.
“Well, you seem to be the only one of the guards that is willing to
believe me.”
He shook his head. “I am not part of the city guard.”
“Then why are you here?”
“I am here as a favor to an old friend to help solve the case of
these murders. Murders that I am very confident you did not do.”
She cocked her head. “I’m happy to hear that - trust me, I am. But
how can you be so sure?”
“Because I believe I already know who the murderer is.” The fire was
back, and his mind was beginning to clear once again. “Harlow was
correct about the music box, yes?”
Aeon nodded. “I’m not happy that little secret is out, but yes, it’s
true.”
“Err, so you heard what happened the night of the murder?”
Aeon smiled. “Hey, Beaky,” she called down the stairs.
An albino kenku emerged from the darkness, his eyes shifting between
Aeon and Umberto. He made his way quickly up the stairs and shivered
next to Aeon.
“I need you to repeat the murder one more time,” she said to him -
softer than Umberto had been expecting.
The kenku nodded. A moment later he opened his beak and began
producing sounds of two men talking while walking down a street.
Umberto smiled. “This kenku is able to perfectly recall what he heard
on the sending stones.” He looked up at Aeon. “That is very clever.”
Aeon smiled back and tipped her top hat to him.
Umberto listened to the kenku mimicry. As he did, he played the scene
out in his mind as he had done in the alleyway earlier that day.
Connecting the images he had memorized with the sounds of the murder. It
played out nearly exactly as he had deduced, with only a few minor
differences. When the name of his sister was said, it came as no
surprise - in fact, he hadn’t even realized that he had put Sliver in
the place of the killer already.
“Stlarn,” said his sister’s voice, and Umberto smiled.
“Thank you,” he said as the kenku finished. “And you believed the
killer would be coming after you? To stop you from revealing this
information?”
Aeon nodded. “That would be why my tavern is full of Xanathar
agents.”
“Err, a reasonable expectation and,” he paused. “A measured
response.”
“So,” Aeon said. “What do we do now?”
“Follow me back out there. I am ready to reveal what happened.”
“Sure,” she said. “Why not? Beaky, you stay here.”
The kenku looked relieved and nodded.
Umberto stepped back out into the tense tavern room. Waterdhavian
guards stared down Xanathar agents and Harlow still stood in the center
of the room. The aumarr stared at Umberto with hate in his eyes. That
made Umberto put on a smile he’d seen Brenton wear so often when Umberto
was young. It always came before Brenton said, “Let me teach you a
lesson.”
“Aumarr,” Umberto began as he stepped up behind the bar. “You said
something that stood out to me earlier today. When talking about the
Xanathar Guild and the Zhentarim, you said, ‘ Let the tluining bastards
destroy each other, I say.’ This seemed odd to me for an aumarr to say.
An aumarr of Waterdeep should want to bring those factions to justice,
should they not? No offense to those present in the room.”
Harlow’s eyes narrowed as he looked around at the Xanathar agents.
“What’s your point? Both are a stain on this city. Why should I care how
they get brought down?”
“You see,” Umberto said, wagging a finger towards Harlow. “That’s the
thing. I think you do care. I think you care so much you planned it out.
And who could blame you? You’re the son of one of the most celebrated
members of the Waterdhavian guard - that’s a lot to live up to. But from
what I have heard, you’ve fallen short of those expectations.”
Harlow growled. “Is there a point to this? Or are you just here to
insult me?”
Umberto ignored him. “You decided to step things up. Make a name for
yourself that isn’t just because of your surname. You needed something
big. Something people would remember for generations. You needed to
solve one of Waterdeep’s longest running problems. The Xanathar
Guild.”
Aeon chuckled behind Umberto, leaning against the back counter. “But
I thought they were my problem?”
“That is a good point,” Umberto said with a nod. “The accusations you
made about Aeon were very interesting to me. When you started, you
sounded unsure of yourself, as if you were coming up with the words as
you spoke them. But then, at a certain point, you got onto a roll. The
story flowed out of you like you knew it already. It was you that wanted
a war between the Xanathar Guild and the Zhentarim. You wanted to weaken
the Guild or obliterate them in the process. I wouldn’t even be
surprised if you hoped to weaken both factions to the point that you
thought you could take both of them down.”
Harlow was as red as an apple now. Fists clenched. Face twisted in a
scowl. “And what? I hired your dead sister to do the killing for
me?”
Umberto felt that thorny vine twist a little, but he ignored the
pain. “That was the funny part for me. You had no idea that I would be
here. It just so happened that the only Zhentarim agent of renown you
had ever gotten up close to had been my sister. That’s why you looked so
shocked when we first met. You were already stumbling through a string
of bad luck. First Aeon’s music box, then your father calling in someone
to do your job, and then the brother of the person you stole the
identity of arrives in their place.”
“None of this is true,” Harlow said.
Umberto ignored him again. “I’ve heard what happened that night in
the alleyway now, thanks to Aeon.” He gestured to the goliath and she
made a mocking curtsy. “And again, if it were not for the fact that I
grew up with Sliver, no one would have suspected it wasn’t her.” Umberto
stared down Harlow. “My sister never swore. She found them to be filler
words used by people who didn’t have anything to actually say.”
Harlow began to shake. “I did not impersonate your-“
“You must have been so scared when that sending stone fell out of the
music box,” Umberto interrupted. “I found it so strange that it was
broken and tossed away. But you panicked. You broke it, then realized
you couldn’t just leave it, so you put it somewhere you thought no one
would ever suspect to look. If you had just left it there it would have
been so much easier for you to pin all of this on Aeon. And you realized
that. Which is why you started pointing everything you could towards
her.”
“You have no proof!”
“You’re right,” Umberto said. “I don’t. But you do. When we were on
the rooftop, I noticed your hand went for your coat when I mentioned a
disguise. When I was applying your wig and nose, I cast a Detect Magic
spell and found an aura of transmutation on you. If I had to guess, you
have some item that lets you cast True Polymorph.”
The room went still, and all eyes fell on Harlow. It looked as if the
man might suddenly explode with rage. Instead, Harlow seemed to gather
himself. He stopped shaking, lowered his shoulders, and let out a long
breath. After a moment, he looked up and locked eyes with Umberto. “My
biggest mistake was missing that crossbow shot.”
Aeon laughed. “You’re biggest mistake was that haircut!”
Harlow pulled a wand out from his coat. Xanathar agents, even some of
the undercover guards, moved to stop the man, but he was faster and the
spell was instantaneous. Lavender colored smoke flowed from the end of
the wand, covering Harlow as he smiled at Umberto. Then, everyone around
Harlow was thrown back against the walls of the room as something
massive formed in the tavern.
A shape moved in the smoke. A low growl rumbled through the building
as a clawed, skeletal hand appeared. The growing glow of firelight cut
through the smoke as the skull of a red dragon came into view. Bits of
dead muscle and flesh still hung to the bone, and red glowing firelight
filled its empty eye sockets.
The guards yelled in fear as the red dracolich that had been Harlow
readied to strike.
“Get him, Deuce,” Aeon said as the dracolich began to approach.
The undead creature’s claws dug into and split the boards she had
laid by hand years before. It pulled itself forward as if still trying
to understand how its body worked.
That’s what you get for choosing something showy, you plinth
head.
Deuce leaped from her shoulder, landing on the bar just as Umberto
climbed on top of it. It was clear the older man could do magic, but
Aeon didn’t know what to expect from him. A moment later, Umberto
hunched forward, then threw his arms out with a fearsome roar as he
shifted into a large brown bear.
Somehow, she noted, that makes sense.
Xanathar agents and city guard sprung into action, weapons at the
ready. They charged the dracolich, for whatever good it would do. Aeon
commended them for their effort, but those weapons were going to need a
magic touch if they were going to be effective. Especially since the
dracolich looked as if it planned to take care of them with a swipe of
its wings.
Luckily for them, Deuce had been charging up his energy beam.
There was a flash of white light as Deuce opened his mouth wider than
a real monkey would be able to - and an instant later, a blue beam of
magical energy streaked towards the dracolich. In the same moment, the
bear that was Umberto leaped into the air, crossing the distance between
the bar and the undead creature just after the beam struck.
The blast from the beam made the dracolich flinch, its head bobbing
for a moment - giving the guards and agents their opportunity to strike.
As it shook off the attacks, Umberto’s claws connected with the
creature’s skull, slicing deep grooves into the bone. The bear landed on
its hind legs with a thud that shook the whole tavern and readied for
another swing.
The dracolich that had been Harlow let out an unnatural roar.
Somehow, there were bits of Harlow’s voice in the sound. “You’re dead,”
came Harlow’s voice. “I’ll kill you all!”
Aeon clocked Umberto’s next attack and gave a quick whistle to Deuce,
who instantly understood, as she flipped a switch on her cane. The
crystal in the head of the cane began to glow and charge, humming with
energy.
The dracolich righted itself, sweeping out its wings and tossing the
agents and guards into the opposing walls. As it did, it roared at
Umberto, fire forming in the back of its skeletal jaw like a raging
inferno.
Umberto responded to this with an uppercut swing of his bear claws.
As he swung, Deuce scrambled up the bear’s legs and body, then down his
arm, charging another blast. As Umberto struck the lower jaw of the
dragon skull, Deuce unleashed another powerful blast - the combined
force sending the dracolich’s head up and crashing into the ceiling.
“You’re paying for all of this damage, Harlow,” Aeon said with a grin
as the dracolich tried to pull its nose out of the ceiling. She raised
her cane and leveled it like a crossbow, eying the sinew and decaying
muscle between the dracolich’s ribs. With three quick pulls of the
trigger, the cane fired as many bolts of blue, flaming energy. Each bolt
found its mark, disintegrating the bits holding together several of the
ribs.
Umberto seemed to understand what she was going for. He grabbed onto
two of the ribs and began to pull with a roar that Aeon could feel in
her chest. Bones snapped and muscle tore - and with another whistle,
Deuce scurried around Umberto and onto his shoulder. As the ribs parted,
Deuce fired another beam - this one sustaining longer than the others -
into the dracolich.
Bone and sinew disintegrated as the beam cut through what had been
Harlow. It roared with pain - Harlow’s voice sounding like the most
pained part. After a moment, the beam sliced through the dracolich’s
spine, severing the creature in half. The lights went out in the skull,
and the skeletal form began to collapse.
Before it could hit the floor, or land on Umberto, the image of the
dracolich wavered, replaced by the small form of Harlow - who landed on
broken boards with a grunt.
“No,” Harlow said with a groan. “No!” He tried to get up, but the end
of Umberto’s staff pressed down on his back.
Umberto’s form returned, Deuce still on his shoulder, as Harlow
looked up at him. “Guards,” Umberto said. “Take this man away.”
Umberto enjoyed every bite of breakfast the next morning. Aeon had
invited him the night before for a free meal and drinks if he wanted
them. He had graciously accepted the food but passed on the drink.
Alcohol wasn’t something he liked having in the morning. But, after
everything he’d been through the day before, he’d given it serious
thought.
But, as he swirled the last piece of sausage in the yolk of the
perfectly cooked eggs, he knew this was all he needed. Good food did
wonders for Umberto’s mind, and he felt as if he could enjoy it just a
bit more than he had the day before. Things were different. He was
different. No, that wasn’t it. He felt like he had over six months
before. And that was a feeling he needed.
Aeon sat down at the table. “How was it?”
Umberto was still chewing the sausage, but smiled and made a warm
sound that clearly said, “it was delicious.” When he finished chewing,
he added, “like honey from the hive.”
“Good,” Aeon said. “I’ll give your compliments to the Chief. They’re
an automaton, but I’ll still tell them.”
Umberto wiped his mouth and mustache with the napkin, then set it
over the finished plate. “You certainly cleaned things up quickly.” He
gestured to the tavern that looked almost like new. The only hint from
the fight with the dracolich were the broken boards of the ceiling.
“Just one of the plus sides of making all of my staff by hand. I get
to decide how fast they work.”
They laughed, and Umberto noticed an envelope Aeon was holding.
“So,” Aeon said. “What do you think Harlow’s endgame was with me? Did
he really think he could just pin everything on me?”
Umberto nodded. “I believe so. The reason he didn’t have a magister
here was probably so he could toss the place and find enough things to
make a story. The guards found a magical dagger on him - no doubt the
one he used for the murders. He was probably going to plant it somewhere
here in the tavern to make a case for a magister to convict you.”
“What a plinth head,” Aeon said with a scoff.
“Indeed.” Umberto eyed the envelope. “Err, may I ask what is in that
envelope?”
“Oh,” Aeon said as if she had forgotten she was holding it. “I wanted
to thank you. I had a pretty good plan in place last night, but I don’t
know if I could have pulled everything off without you. I for sure
couldn’t have gotten the guards to let me go without any extra
investigation without you. So,” she trailed off as she put the envelope
on the table.
Umberto went for it, but Aeon held up a hand. “Before you look at it,
I need to tell you. Your sister is alive. Don’t ask me how I know, or
how I got this information - because you won’t like either of the
answers. In that envelope is the location of where she is being held. Do
with it what you will.”
She moved her hand and Umberto found his own moving slower now as he
picked up the envelope. The vine began to wilt as a flower of hope began
to grow. “You’re sure it is her?”
“As sure as I can be,” she said as she stood. “Just please, don’t go
getting yourself killed. You seem like too nice of a guy for that to
happen to you.” She paused for a moment. “Before I go. I heard from one
of the guards that this was your first case in six months? That you had
given this line of work up?”
Umberto nodded, having to force himself to look away from the
envelope and up at the goliath. “I… I’m still not sure if I will be
picking it up again.”
Aeon gave him a friendly smile. “Well, you should. People like you
make being a criminal fun.”
With that, she walked away, Deuce hopping down from the rafters onto
her shoulder.
For a moment, Umberto let himself think about getting back to work
again, full-time. Taking on cases, solving crimes, bringing criminals to
justice - everything. And, to his surprise, there was no fear. No
anxiety. No mud around his feet holding him back. Yes, he could do this
again. He would do this again. But first…
He picked up the envelope.
“But first, I have something I need to do.”
The End
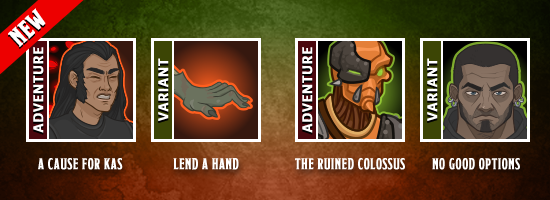
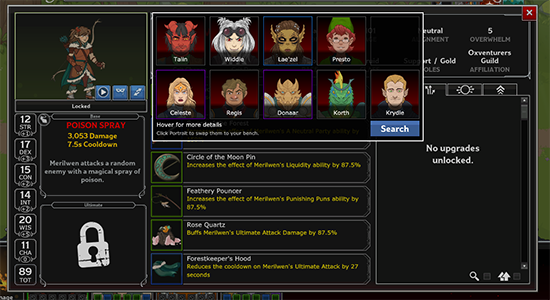
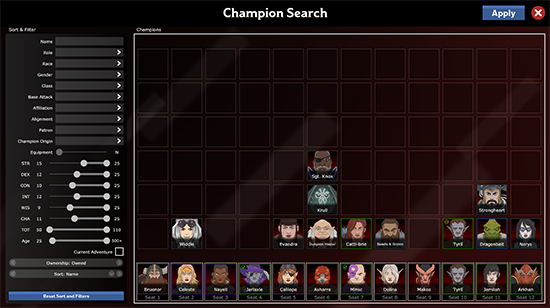
Umberto Thornheart and Aeon are coming to Idle Champions July 3rd as part of Founders' Day. Keep an eye out for their Champion Spotlights coming later this week!
Join our amazing community with any of the links below: